The Rockwell hardness test is one of the most widely used methods for measuring the hardness of materials, particularly metals. With its broad application in industry, understanding how this test works and its significance can make all the difference in material selection and manufacturing processes. In this article, we will explore the key aspects of the Rockwell hardness test, from its definition to its practical applications, as well as its advantages and differences compared to other hardness testing methods.
What is the Rockwell Hardness Test?
The Rockwell hardness test is a measurement method that evaluates the hardness of materials, especially metals, by assessing the depth of an indentation left by a penetrator under a specific load. Developed in the early 20th century, this technique has become an industry standard due to its simplicity and speed.
Essentially, the test involves applying an initial light load, followed by a heavier load, which is maintained for a specific period. After removing the heavier load, the depth of the indentation is measured. This depth is then converted into a hardness scale, which can be expressed in different units, such as Rockwell A, B, or C, depending on the type of penetrator and load used.
One of the major advantages of the Rockwell hardness test is that it does not require special sample preparation, allowing tests to be performed directly on finished parts. This facilitates the evaluation of material quality without the need for cutting or complex preparation.
Therefore, the Rockwell hardness test is a crucial tool for engineers and industry professionals, providing valuable insights into the strength and durability of materials used in various applications.
How is the Rockwell Hardness Test Performed?
Performing the Rockwell hardness test is a relatively simple process, but it requires attention to detail to ensure accurate results. Let’s break down how this test is conducted step by step.
First, the sample to be tested must be prepared. It is essential that the material’s surface is clean and flat, as imperfections can affect the accuracy of the measurement. If the part has a rough finish, it may be necessary to sand or polish the test area.
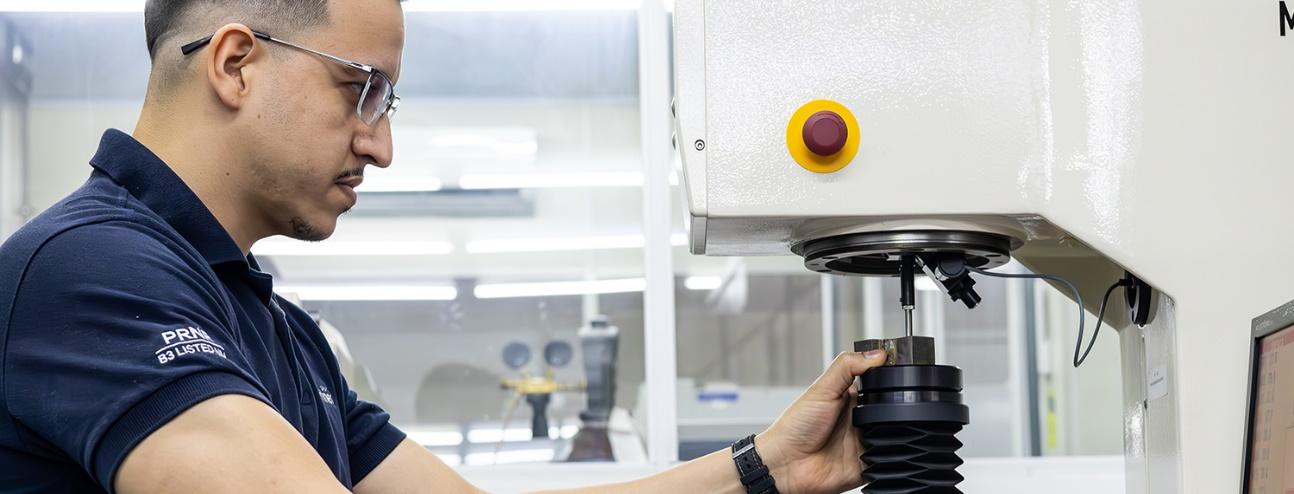
Once the sample is ready, the next step is to place it in the testing machine. The machine is equipped with a penetrator, which can be a steel ball or a diamond cone, depending on the Rockwell scale being used. The choice of penetrator and applied load varies according to the type of material being tested.
The test begins with the application of an initial light load, which is held for a short period. This creates an initial indentation on the material’s surface. Next, a heavier load is applied, and the resulting indentation depth is measured after this load is removed.
The hardness reading is automatically calculated by the machine, which converts the indentation depth into a Rockwell hardness scale, such as HRA, HRB, or HRC. This information is critical for determining whether the material meets the required specifications for its application.
Finally, it’s worth noting that the Rockwell hardness test is quick and can be repeated at different points on the sample to ensure consistent results. This efficiency makes the method widely used in industrial environments where material quality is essential.
Applications of the Rockwell Hardness Test in Industry
The Rockwell hardness test has a wide range of applications in industry, serving as an essential tool for ensuring the quality and durability of materials used in various sectors. Let’s explore some of its primary applications.
One of the most common areas where the Rockwell hardness test is used is in the metallurgical industry. Manufacturers of metal components, such as gears, shafts, and structural parts, use this method to ensure that materials meet the necessary hardness specifications to withstand loads and stresses during operation.
Additionally, the test is widely applied in the production of cutting tools and molds. Hardness is a critical factor for the performance of these tools, and the Rockwell test allows manufacturers to verify whether the selected materials provide the necessary wear resistance.
Another significant application is in the automotive industry, where the hardness of components is crucial for vehicle safety and efficiency. The Rockwell hardness test is used to evaluate parts such as pistons, valves, and suspension components, ensuring they can withstand demanding operating conditions.
Beyond the metallurgical and automotive industries, the Rockwell hardness test is utilized in sectors such as aerospace, for the production of critical components that must resist high pressures and temperatures, and in the appliance industry, where material durability is a key factor in consumer satisfaction.
Finally, the versatility, speed, and accuracy of the Rockwell hardness test make it a popular choice among engineers and quality professionals, enabling companies to maintain high standards in their products.
Advantages of the Rockwell Hardness Test
The Rockwell hardness test offers several advantages that make it one of the most popular methods for measuring material hardness in industry. Let’s explore some of these benefits.
One of the primary advantages is the speed of the process. The test can be completed in a matter of minutes, allowing engineers and technicians to obtain immediate results. This is particularly valuable in production environments where efficiency is critical.
Another significant advantage is its ease of use. Operating the equipment for the Rockwell hardness test is relatively straightforward, requiring less training for operators. This results in a lower margin of error and the ability to conduct tests in various settings, even outside specialized laboratories.
Additionally, the Rockwell hardness test does not require complex sample preparation. Unlike other methods that may demand extensive cutting or polishing, the Rockwell test can be performed directly on finished parts, saving time and resources.
The test’s versatility is also a strong point. It can be used on a wide range of materials, including ferrous and non-ferrous metals, plastics, and alloys, making it valuable across industries from metallurgy to appliance manufacturing.
Finally, the Rockwell hardness test provides reliable and reproducible results, which are essential for ensuring material quality. The correlation between hardness and wear resistance makes the test results a valuable tool for engineers in material selection and product durability assessment.
Differences Between Rockwell and Other Hardness Testing Methods
When it comes to measuring material hardness, several methods are available, and the Rockwell hardness test stands out for its unique characteristics. Let’s examine the key differences between the Rockwell test and other hardness testing methods.
One of the most common methods for comparison is the Brinell hardness test. While the Brinell test uses a steel or carbide ball to create an indentation in the material with a specific load, the Rockwell test measures the depth of the indentation left by a penetrator. This means the Rockwell test can provide faster results and does not require specific sample preparation, as is often needed in the Brinell test.
Another popular method is the Vickers hardness test, which also uses a penetrator, but in the form of a diamond pyramid. The Vickers test can measure hardness across a broader range of materials, but the process is more time-consuming and requires microscopic analysis to measure the indentation. In contrast, the Rockwell test offers direct and immediate readings, making it more practical for industrial use.
Additionally, the Knoop hardness test, which is similar to the Vickers test, is primarily used for very hard or thin materials. While the Knoop test can provide precise measurements in small areas, the Rockwell test is preferred when a quick and effective hardness assessment is needed for larger parts.
In summary, the main difference between the Rockwell test and other hardness testing methods lies in its speed and ease of use, making it ideal for industrial environments where efficiency is crucial. While other methods may offer precision in specific scenarios, the Rockwell test stands out for its versatility and practicality.
Interpreting the Results of the Rockwell Hardness Test
Interpreting the results of the Rockwell hardness test is a critical step in understanding the quality and suitability of the tested material.
The results are expressed on a hardness scale, which varies depending on the type of penetrator and load used during the test. The results are presented on different scales, such as HRA, HRB, and HRC. The HRA scale is used for hard materials, such as hardened steel alloys, while HRB is more common for softer metals, like aluminum and copper. The HRC scale is used for very hard materials, such as hardened steel. Each scale has its own characteristics and applications, and it’s essential to choose the correct scale based on the material being tested.
To interpret the results, it’s crucial to understand what the numbers mean. For example, an HRC 60 reading indicates that the material has high hardness, which is desirable for cutting tools and components that need to resist wear. Conversely, an HRB 30 reading may be suitable for parts not subjected to high stresses.
Additionally, it’s important to consider the manufacturer’s specifications and industry standards when evaluating the results. Often, materials have specific hardness requirements that must be met to ensure the safety and efficiency of the final product.
Finally, comparing the Rockwell hardness test results with previous measurements or control samples can help identify variations in material quality. This is particularly relevant in continuous production processes, where consistency is critical.
In summary, interpreting the results of the Rockwell hardness test involves not only reading the numbers but also understanding the context in which these results apply, ensuring that the materials meet the necessary standards for their specific applications.
Conclusion
The Rockwell hardness test is an indispensable tool in modern industry, offering a fast, efficient, and reliable method for measuring the hardness of various materials. Throughout this article, we explored its applications, advantages, and how it is performed, as well as compared its characteristics with other hardness testing methods.
With its ability to provide immediate results and ease of use, the Rockwell hardness test stands out as a popular choice among engineers and quality professionals. Proper interpretation of the results is essential to ensure that materials meet the required specifications, contributing to the safety and efficiency of final products.
Therefore, understanding how the Rockwell hardness test works and how to interpret its results is crucial for any professional working with materials, ensuring that manufacturing process decisions are based on accurate and reliable data.


